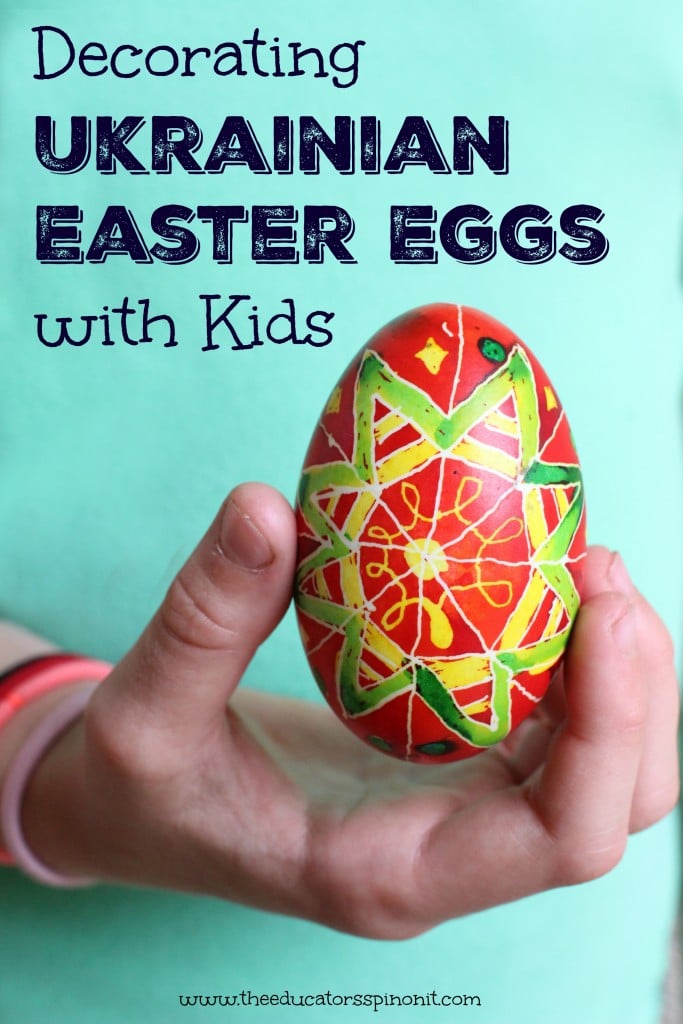
Decorating eggs the traditional Ukrainian way is a great way to teach children about other cultures and art processes. As a family with Russian heritage, we strive to bring global learning into every day.
Decorating Ukrainian Easter eggs with kids was a wonderful way to talk with our grade schooler about Ukraine this holiday season. They turn out absolutely beautiful and are the perfect holiday display.
Recommended for ages 9+ with adult supervision.
Affiliate Links to products in this article.
Decorating Ukrainian Easter Eggs with Kids
Ukraine is a country in Eastern Europe. It borders Russia and many Russians have Ukrainian heritage. Many Russian families food, art, and traditions are influenced by this heritage. My children’s great grandmother, their PraBabushka, was born in Ukraine.
Read more about the history of Ukraine here and download our Ukraine Virtual Field Trip Guide.
The traditional Ukrainian method of dyeing Easter eggs consists of melting wax into patterns and pictures on a clean egg. The designs are written on with wax, not painted in a wax resist method. The egg is then dipped into dye. The color will not stick to any place where the wax is.
Many other European ethnic groups also use this wax resist method for dyeing Easter Eggs.
Ukranian Easter Eggs are fun to make – The layers make it like a surprise gift waiting to be opened.
Vocabulary:
Pysanky – The word for Ukrainian Easter Eggs
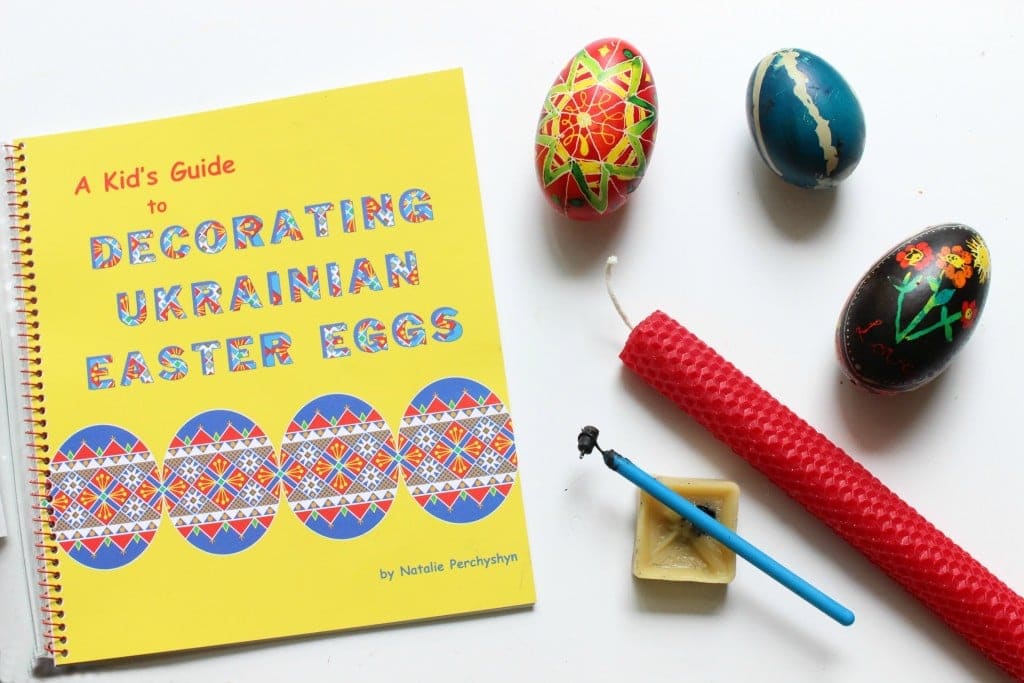
Kistka – The special writing tool used to draw on the egg with hot wax.
Dye – the coloring used to stain the egg
Materials Needed for Decorating Ukrainian Easter Eggs with Kids
- Clean farm egg*
- Pencil
- Candle
- Natural Beeswax
- Dyes
- Kitska
- Tray and table coverings
- Plastic Spoons
- Design book
- Paper towel
- Small paintbrush
- White vinigar
- Distilled water
- Containers for dye (we used the plastic containers from sandwich meat)
- Homemade drying rack
For Egg Drying Rack
- 3 toothpicks per egg
Foam board (I just used one that came with a UPS delivery box)
*Note. Store bought eggs are not recommended for decorating Ukrainian Easter Eggs with kids because of the cleaning solvents used to wash them for the stores. All of our backyard chickens lay brown and green eggs. We asked every vender at our local farmers market, and their chickens all lay colored eggs too. We finally found a friend with duck eggs. These were harder to clean out, but way easier for the kids to hold and decorate using the kistka!
It is not recommended to use hard boiled eggs. We drilled holes in the top and bottom and blew out the contents, then rinsed the inside with water using a syringe. There are much fancier equipment to use but we were only dyeing a few eggs, so we used what we had on hand.
Basic Directions for Decorating Ukrainian Easter Eggs with Kids
Using a clean white egg, draw the design you wish to create in pencil on your egg.
Warm the Kitska in the candle and scoop a bit of natural beeswax into the reservoir.
Steadily draw with wax onto the egg on all the parts that you would like to keep white.
Dip the egg into dye when you have completed writing all the white parts of your design. The waxed parts will stay white. The unwaxed parts will take the color of the dye that you choose to dip it into.
Dye the egg a color. Start with the light color and work towards dark. Some eggs we started with yellow (like the one pictured above) Some eggs we started with blue. You can dip the whole egg in or dab portions in small areas. (This is where the Kids Guide to Decorating Ukrainian Easter Eggs comes in handy! )
Here is a picture of our decorating Ukrainian Easter Egg space with the kids eggs in varying stages of completion. The dyes WILL STAIN! Make sure to cover all table tops with a covering and wear paint clothes.
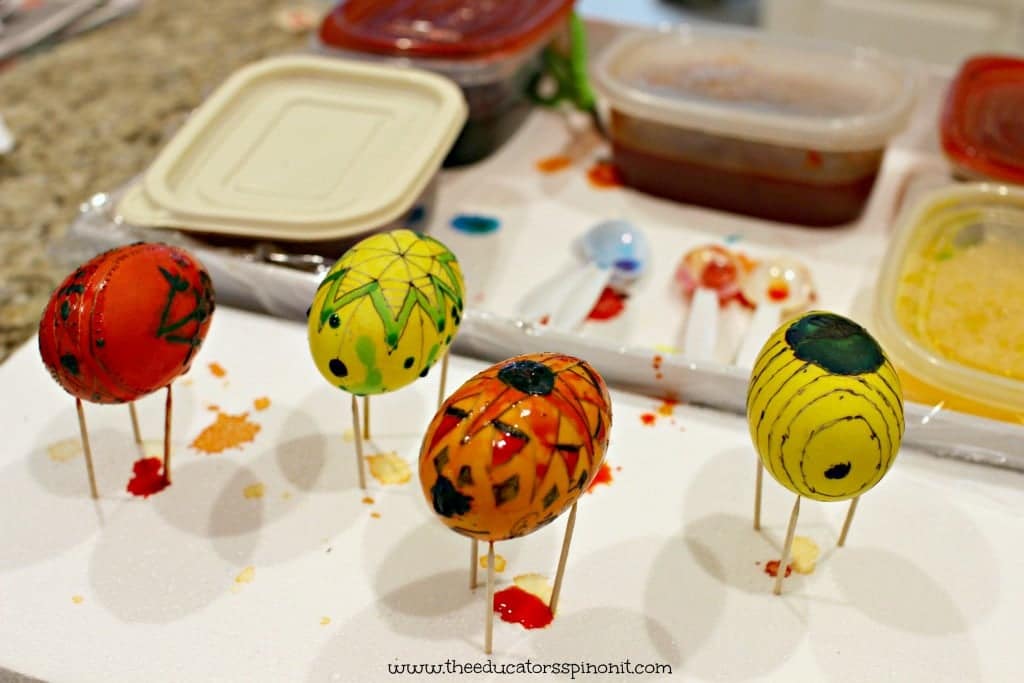
Continue drawing on wax designs and dying the egg with colors. Let your egg dry on an egg drying rack between each layer.
The egg will look very dark! (see below)
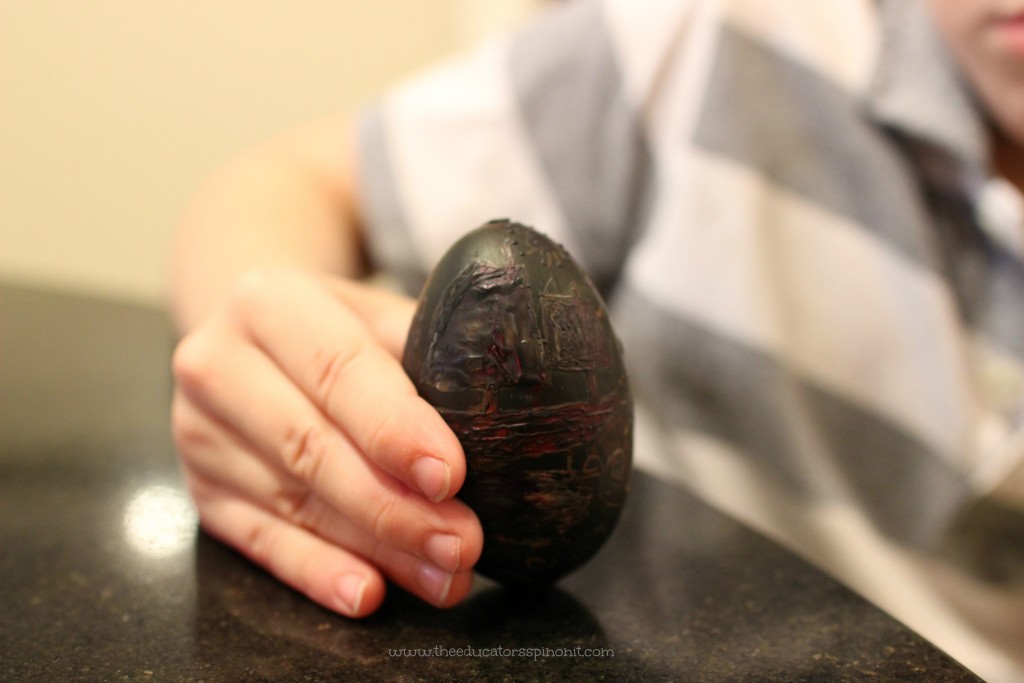
You will melt the wax off the egg by holding it close to the heat source. The design is then revealed. We used a paper towel to wipe off the wax as it was melted.
For eggs to stay longer, you may consider varnishing the egg
A kid’s guide to decorating Ukrainian Easter eggs
I am a creative person by nature, but this book provided us with an invaluable tool with decorating Ukrainian Easter eggs with kids. The step-by-step instructions were easy for my daughter and I to follow.
Additionally, the different designs and patterns gave us enough variety to experiment with, while still being of manageable levels. Author Natalie Perchyshyn definitely has experience teaching children how to decorate eggs.
If you are interested in trying this method yourself, I highly recommend it. Get the book and kit here.
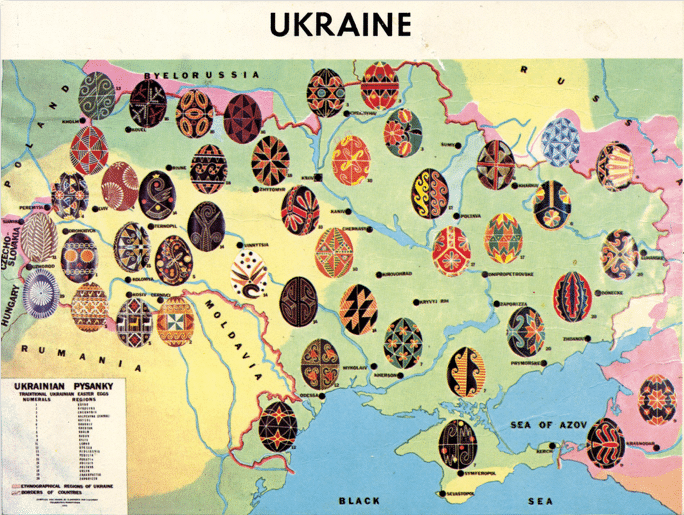
A recent facebook post shared this amazing postcard that features traditional regional pysanky from throughout Ukraine. Here’s more about this Pysanky map postcard which is now featured at the Ukrainian Educational and Cultural Center (UECC) in Philadelphia.
You can see more Pysanky designs here and also in the book The Ukrainian Folk Pysanka by Vira Manko.
More Ideas for combining global learning and art, try these kids activities:
- Chalk paintings of famous buildings
- Kasimir Malevich inspired abstract art project
- 7 Ways to Use Russian Nesting Dolls to Teach
Looking for more Easter egg ideas? Explore 40+ Easter Activities for Kids!
