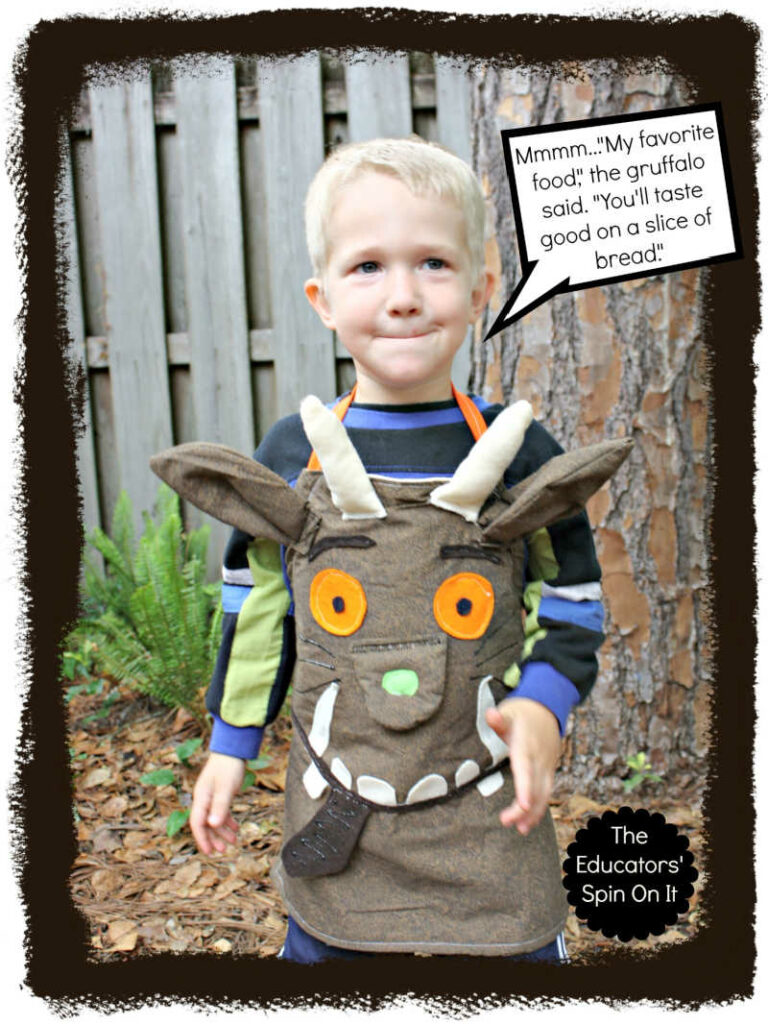
Make this super cute Gruffalo inspired dress up apron for Halloween or pretend play and learning. When you interact with a story through re-telling, children develop stronger vocabulary and understanding of the characters and plot – strengthening their reading!
Learn how to make this Gruffalo Dress up Apron to surprise your favorite Gruffalo fan!
Aha aho
Whose APRON is this and how did it go?
I am so glad you asked because I wanted to share.
It is so cute – why not make a pair?
Amazon affiliate links are included in this post.
How to make a Gruffalo inspired dress up apron for creative storytelling.
My 3- and 6 year olds LOVE of The Gruffalo – a character in the children’s book by writer and playwright Julia Donaldson, illustrated by Axel Scheffler. The main character, the Gruffalo, inspired this costume!
I wanted to create a dress up costume for my little enthusiasts to act out not only the stories of The Gruffalo and The Gruffalo’s Child but also to create their own stories.
I took some pictures of the process in case you wanted to make one for your little ones too! Hopefully, this rudimentary tutorial will inspire you to put your own spin on the Gruffalo!
Step by Step instructions
Materials Needed
- Brown cotton fabric
- Batting
- White felt
- Orange felt scraps
- Lime green felt
- dark brown felt
- Batting
- Sewing machine
- White thread
- Brown thread
- black fabric paint
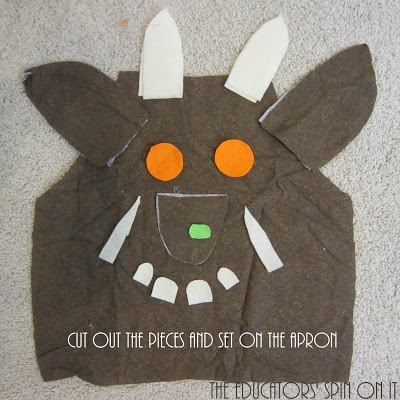
1. TRACE a kid apron onto the brown fabric
I’m on the Eco/budget-friendly reusing crafts, so I just traced a kid-sized apron and used the only brown fabric I had left in a large piece. Short on time? Don’t know how to sew? – skip to the bottom for some ideas!
2. Make the facial features. Eyes, nose, teeth, wart, horns, and ears.
Sketch the face pieces onto the correct color materials. Sorry guys, no pattern – Gruffalos don’t need to be perfect, just ask one yourself! I cut 4 ears, 4 horns, and 2 noses so that I could sew them together with fluff. The horns, wart, teeth, eyebrows, and mouth are felt so that the edges wouldn’t fray.
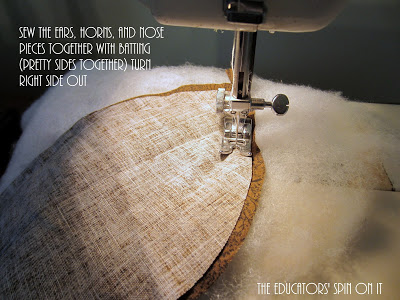
3. Sew the ears, horns, and nose together.
After cutting the pieces out, I sewed the ears, horns, and nose pieces together with the right sides together and batting leaving the bottom open for turning the right side out.
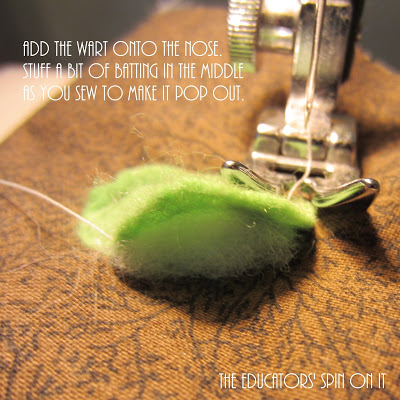
4. Add the wart.
I then added the wart on the nose (after the above step was done) sneaking a bit of batting in the middle as I sewed it on so that it would puff.
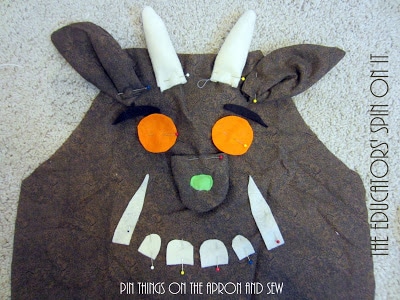
5. Pin the facial features onto the brown apron and sew.
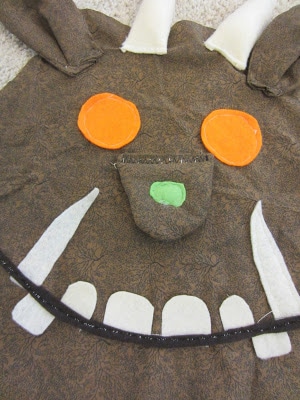
I then pinned each piece and stitched them on with my machine. It’s a little rough on the edges – but hey, it’s a GRUFFALO! I decided to only stitch the bottom of the small teeth so they would stick out a bit. He looked a little too happy, so I added a brown felt tongue too!
6. Add the whiskers and eyes.
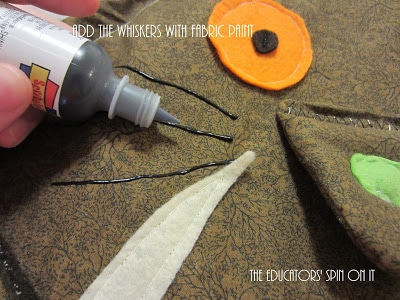
Last, but not least, I added the whiskers with black fabric paint.
Low on time?
Not a big sewer?
Here is what you do…
Use a pre-made apron and brown, orange, lime green, and white felt. Skip the addition of batting and just cut out the shapes and glue them on. Sure yours will look different, but your little one won’t mind.
Need an even quicker/cheaper spin?
PAPER BAG and CONSTRUCTION paper!
No excuses now =)

Please do let us know if you happened to dress up as a Gruffalo!
If you liked this Gruffalo Idea you might like the other Gruffalo Activities featured here for your child.


I was so happy to find this will because I was trying to figure out how to make The Gruffalo for my son’s book character day and it came out so amazing only thing I would suggest is updating the list for things you need because I had to get creative with the black pieces because the instructions did not have that we need black flet but it came out super cute and it was just like the Gruffalo
Thanks so much for this! I’ve just made it in adult size for my daughter who works at a nursery. It was so much fun to make!
I work at a public library and have done an annual Boo-Ha-Ha story time the week before Halloween. Costumes for the attendees is optional and I am terrible at coming up with ideas for myself so I rarely wear a costume. I think I am going to make one for myself – adult size. I recently read this book to all of our local elementary kindergarten classes, so many children will know who the character is. Thanks for your inspiration
That apron is just too awesome for words. It would make a great gift with a copy of the book.
Awe thanks Kim, you always know how to make me smile =)
Thanks!
You are sooo sweet!
Thanks! We love it too!!!
Amanda you blow me away with your creativity! Can't wait to see your post with the finger puppets. This would make a fun teacher or librarian gift too!
I LOVE this! Pinning it 🙂
Oh my goodness – this is absolutely adorable!
This is so cute! I love it! What a great retelling tool! I am going to pin it.