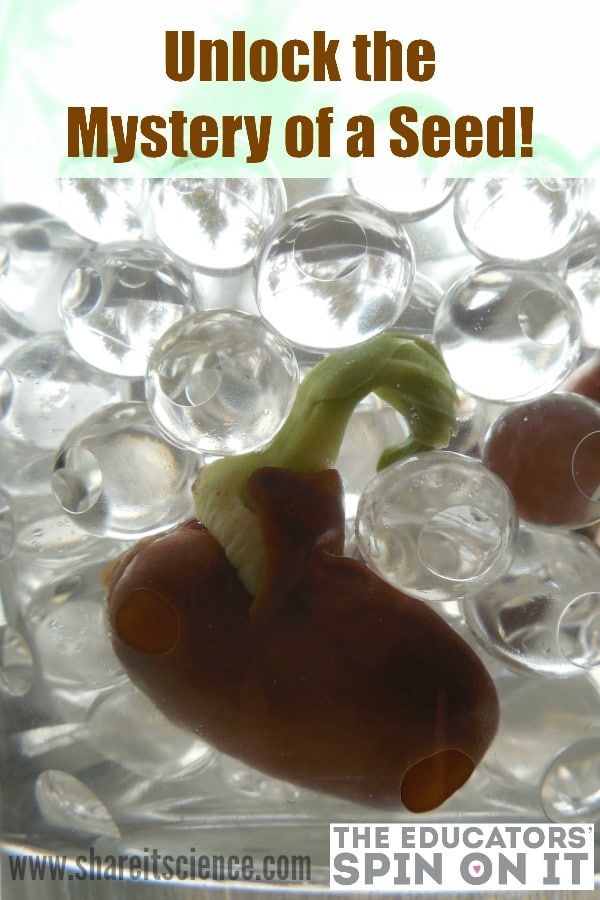
A great way to spark a child’s interest in gardening or plant science is to unlock the mystery of that window of time between planting a seed in the soil and seeing a little green sprout appear. This seed germination science experiment will encourage your child to unlock this mystery.
In my opinion, growing plants with children is one of the greatest joys of the warmer months. Not only are there inherent academic lessons in the life cycle of a plant, but there are also life lessons, too.
CLICK NOW FOR MORE GARDEN IDEAS WITH KIDS
In this science experiment your students or children will be able to see the first steps in a plant’s life. Using a variety of seeds and by building a super-easy “germination jar” you can hypothesize which seed will begin to sprout first and what it will look like. This science project is an excellent introduction to plant life cycles in the primary grades, and can also be extended in many ways for older kids, too.
What You’ll Need to Germinate a Seed!
You have a few options of how you might go about this experiment. I would highly recommend using these directions to build a water bead seed germination jar. It is my new favorite ways to share plants with kids because it makes it possible to easily see everything taking place with your little seed, it is a cinch to set up, and it is very low maintenance! We’ve used this method in the images throughout this post.
Another option is to use a damp paper towel and zipper-style plastic bag. If you choose this route, you’ll moisten a few layers of paper towel, wringing them out so that they are damp, not dripping. Place the seeds on them and then sealing it all up in a plastic baggie. This is like a little plastic bag greenhouse. (Although this method works, you’ll want to watch for signs of mildew or mold and replace the paper towels if necessary.)
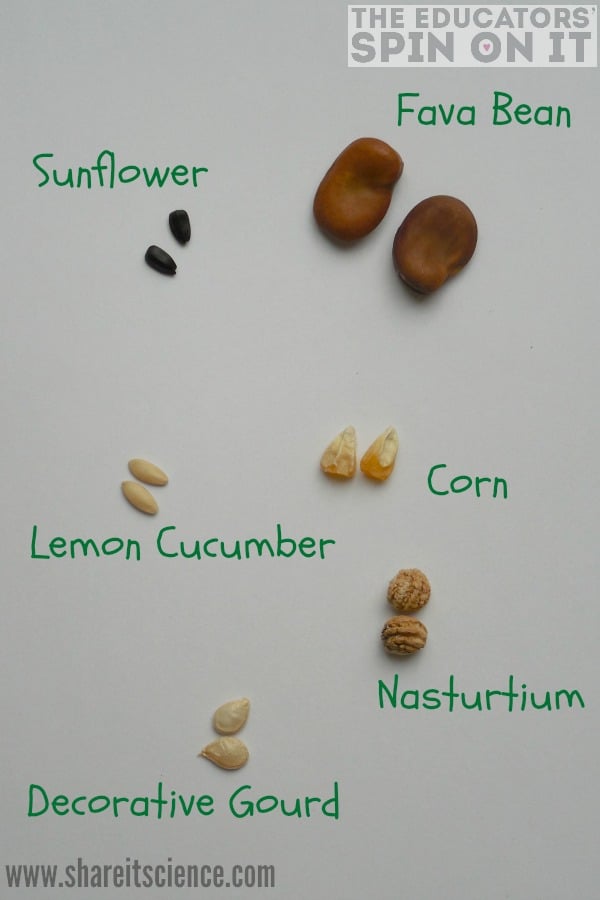
You’ll also need the seeds! We used seeds that we already had, choosing those that were good for growing with kids and those that I knew we’d like to plant in the garden later on. In our experiment we used: fava bean, corn, sunflower, lemon cucumber, decorative gourd, and nasturtium seeds.
There are certainly many other choices, but it is important that the seed is large enough for kids to handle and to see. Fava beans are huge seeds, perfect for small hands. Corn germinates quickly. There are tons of math and science learning opportunities when you grow sunflowers. Lemon cucumbers are great for container gardening and taste just like a regular cucumber. Little decorative gourds can be grown in big planters. Nasturtiums are a great flower choice for kids because the plant is edible- both leaves and flowers!
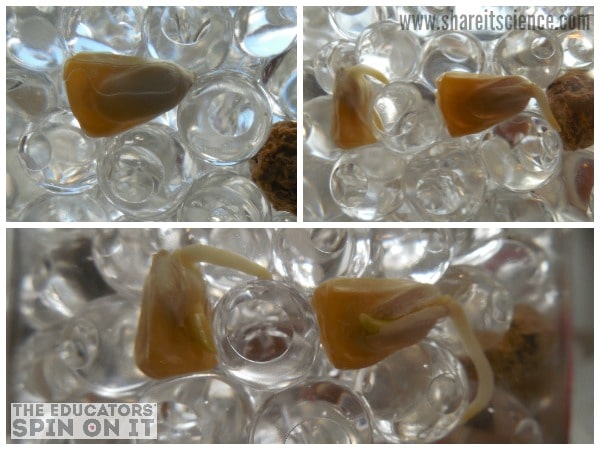
Seed Germination Science Experiment
First, soak all of your seeds in a glass of water overnight. This gives them a bit of a jump start and you’ll have more success with your experiment.
Set up your germination jar or plastic baggie “greenhouse”. If you are using a water bead germination jar, you’ll want to add just a little water around the outside edge each day to help keep it wet enough. Then within a few days you should see some action.
Challenge your children or students to predict which type of seed will germinate first, and what the process will look like. This is a great opportunity to make a chart and have students hypothesize what day each particular seed with begin to grow. Have the kids draw what they think it will look like when the seed starts to grow. Then they can continue to draw the germinating seeds as they observe what actually happens.
Plant Science Activity Extensions
You can easily extend this to make it a life science STEM lesson, or a science lesson geared towards older children. When observing the seeds germinating, you can learn about “tropism”, which is when a living organism turns in a certain direction based on some sort of outside stimulus. We see phototropism all of the time as plants lean toward sunlight.
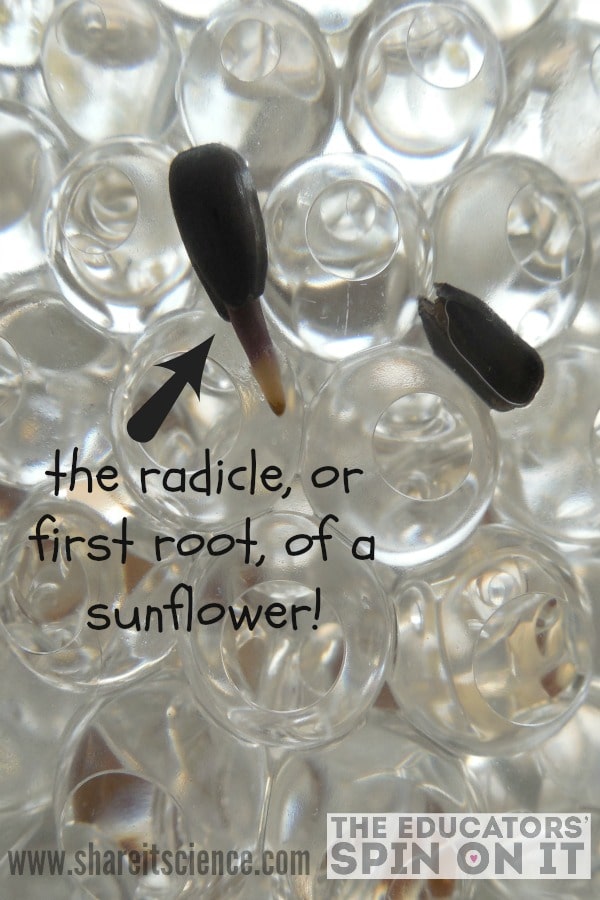
When the first little root, or radicle, pops out of the germinating seed you may see some very strong geotropism, as it moves downward. This is the plant’s response to gravity. You can track geotropism on your germination jar by marking where the root is growing with a dry erase marker, and then comparing where it is the next day.
If you have the technology, you can create a time-lapse video of the germinating seed to see it in motion. There are many free time-lapse apps for the iPad and other tablets where you can set the device to periodically take a photo of the seed. Stitch the photos together and you’ll see the seed germinating very rapidly!
Another fun learning activity is seed dissection. Very carefully slice a large seed in half for your kids and allow them to see inside. Do it again to the same type of seed once it has started to sprout. See if you can find the different parts of a young seed, the seed coat (outer protective layer), the radicle (first root), the hypocotyl (the first shoot) and the cotyledons (the first leaves).

Sarah Benton Feitlinger, M.Ed. is a former Preschool-6th science teacher, mom, blogger and science writer, curriculum consultant and developer. She is passionate about educating children, and loves anything and everything science!
Check out her blog, Share it! Science for fun science, STEM and STEAM activities, lessons, science news, book reviews and other resources for kids, teachers, homeschoolers and parents.
For more gardening ideas with Kids CLICK HERE
